How to Add & Animate Your SVG Logo Inside Your Global Header with Divi’s Theme Builder & Anime.js
Make Your Website Stand Out with an Animated M88 Logo in Your Global Header
Let’s get to it.
Preview
Preview the Animated M88 Logo on Different Devices
Desktop
![]()
Mobile
![]()
Download The Global Header Template for FREE
To lay your hands on the global header template, you will first need to download it using the button below. To gain access to the download you will need to subscribe to our newsletter by using the form below. As a new subscriber, you will receive even more Divi goodness and a free Divi Layout pack every Monday! If you’re already on the list, simply enter your email address below and click download. You will not be “resubscribed” or receive extra emails.
1. Create SVG Logo in Adobe Illustrator & Get SVG Code
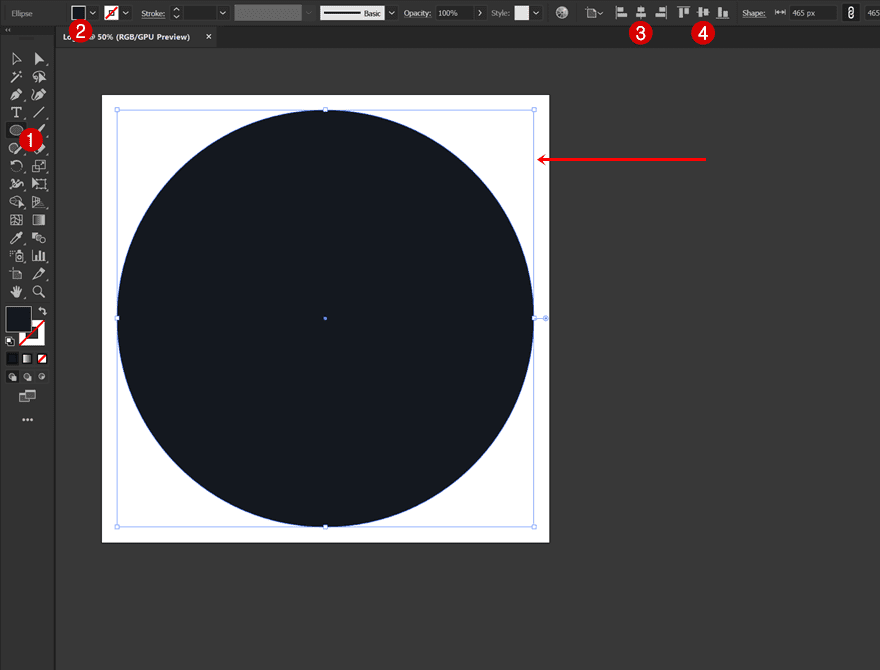
Open Illustrator & Create New Document
In the first part of this tutorial, we’ll create a simple logo inside Adobe Illustrator. If you have an SVG logo of your own already, feel free to use that one. Alternatively, you can also access the logo sample Illustrator file in the download folder above. If you prefer creating the logo sample from scratch, start by adding a new document with a 1:1 ratio.
- Width: 500px
- Height: 500px
![]()
Add Circle to Existing Layer
The first element we’ll add is a circle. We’ll use a fill color that matches the Spice Shop Layout Pack’s color palette. We’ll also make sure the circle is centrally aligned inside our canvas.
- Fill: #0C1019
- Stroke: None
Create New Layer & Add Logo Text
Next, we’ll add a new layer.
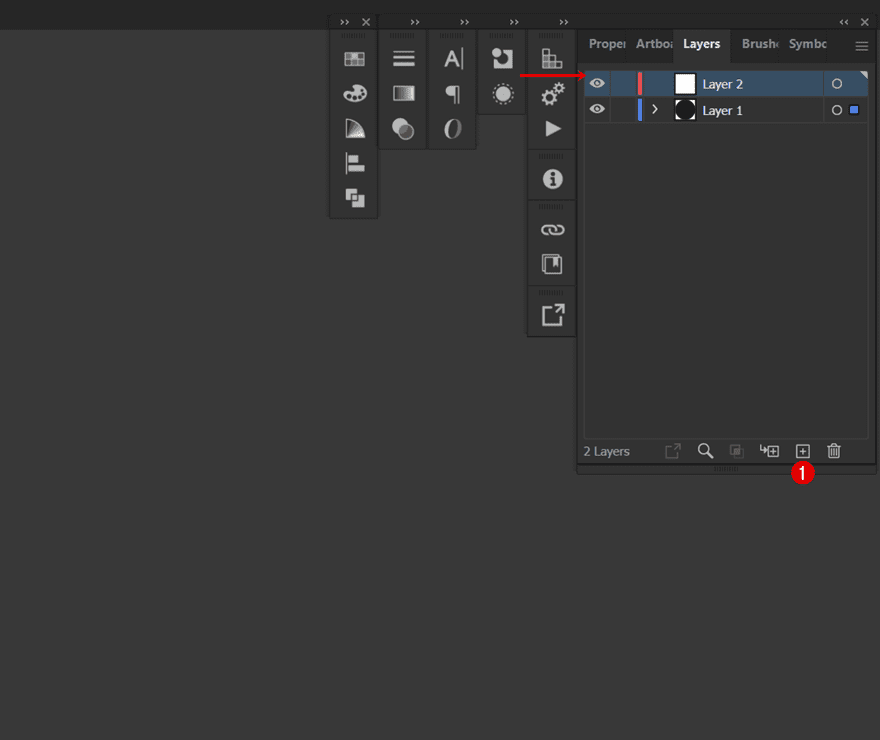
We’ll use this layer to add some logo text.
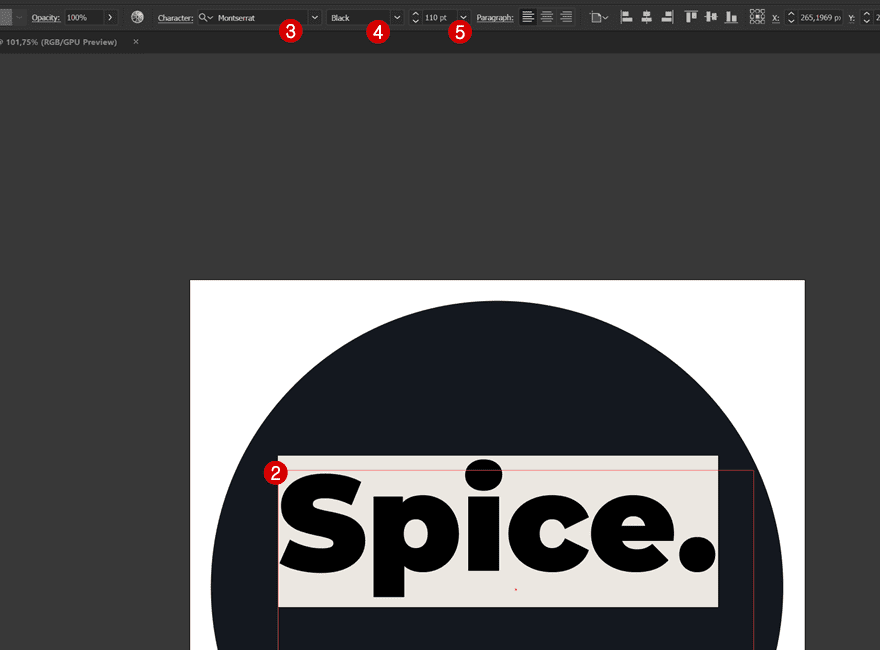
- Font: Montserrat
- Font Weight: Black
- Font Size: 110pt
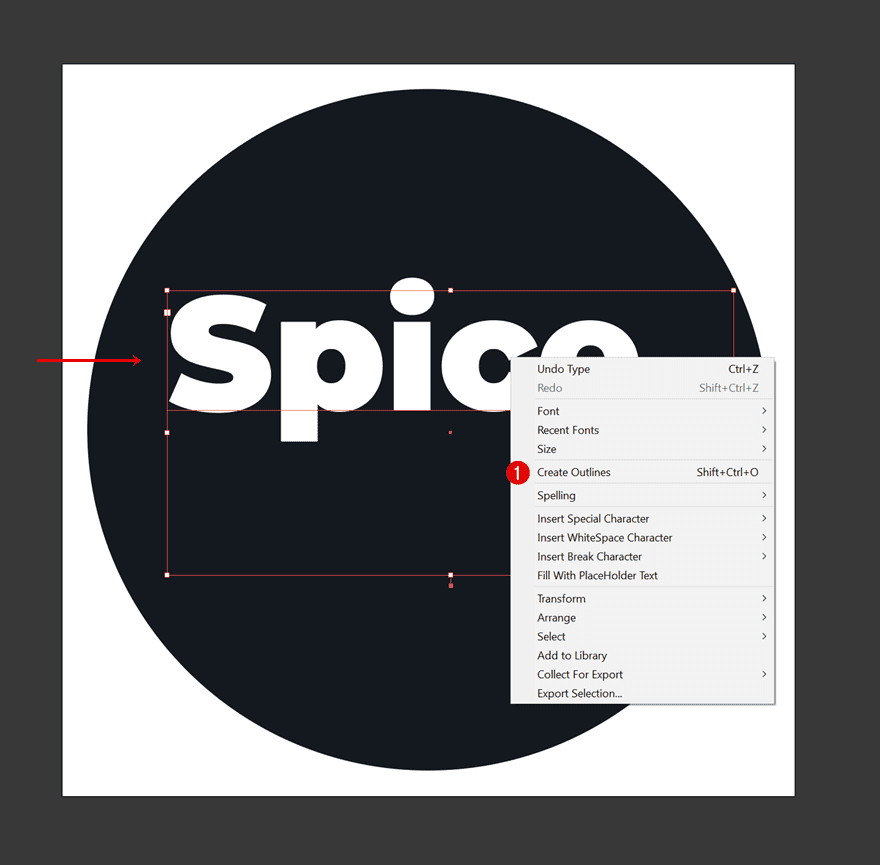
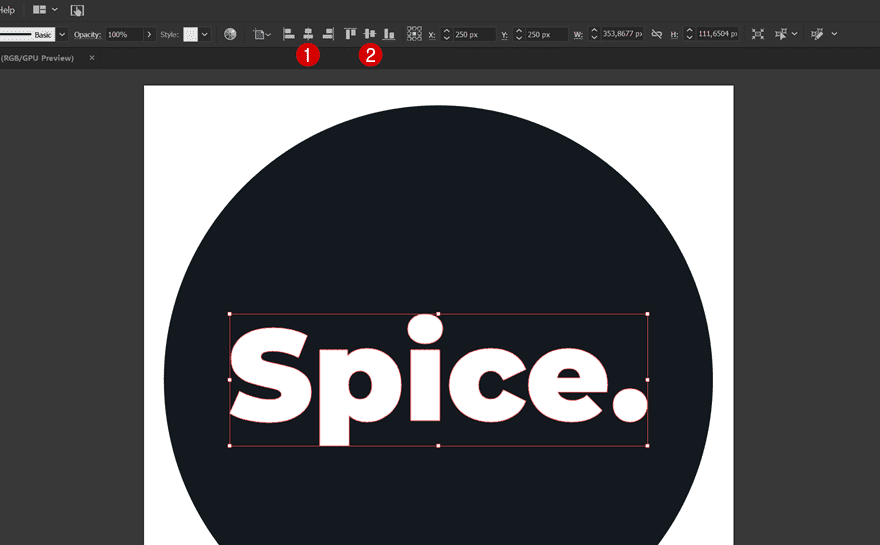
Create Outlines for Logo
Once you’re done modifying the logo text, you can right-click on the element and click “Create Outlines” to turn the text into an outline.
Align Text Outlines
We’ll make sure the text outlines are center-aligned as well.
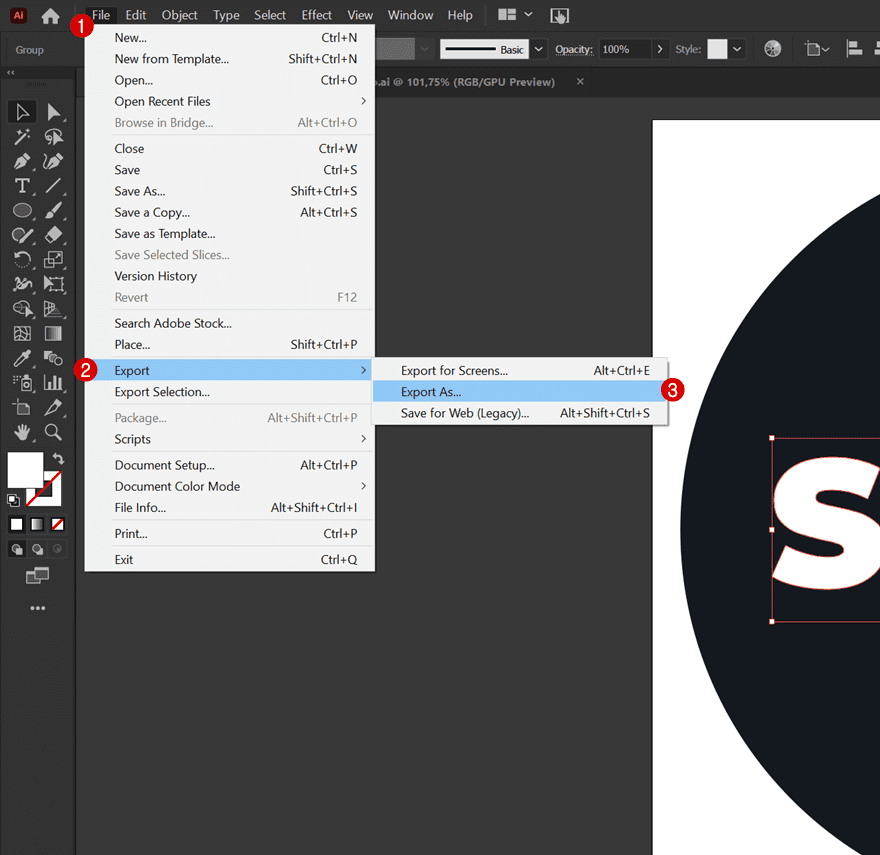
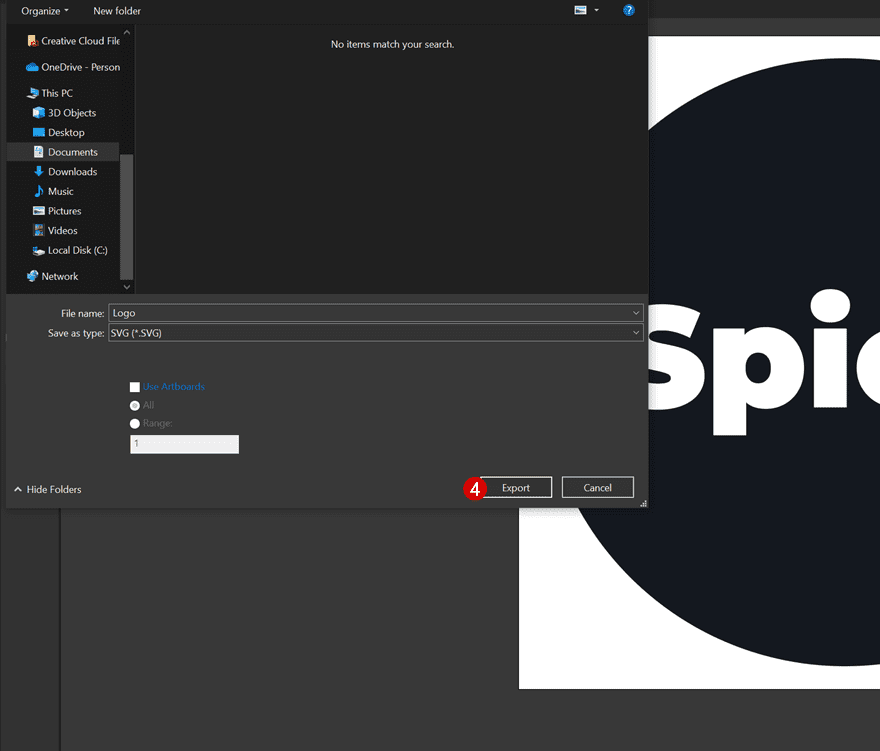
Export as SVG
Now that we have all paths in place, we can export the SVG. To do that, we’ll hover the “File” option at the top, go to “Export” and click on “Export As…”.
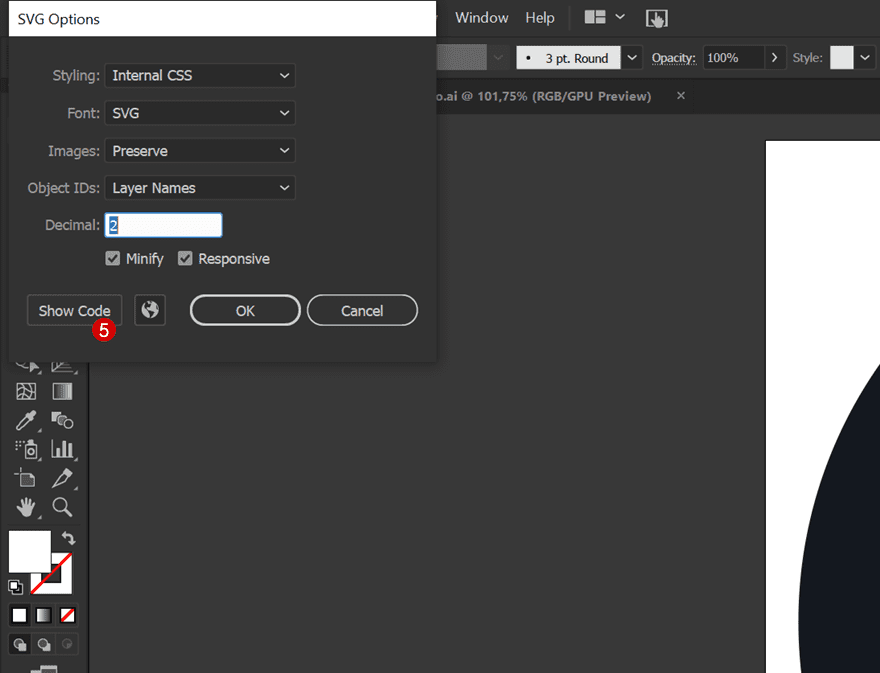
Get SVG Code
Once you’ve clicked the “Export” button, you’ll see a window appear with some additional SVG options. There, you’ll be able to copy the SVG code. Make sure you keep the SVG close by for use later on this tutorial.
2. Start Creating Global/Custom Header inside Divi Theme Builder
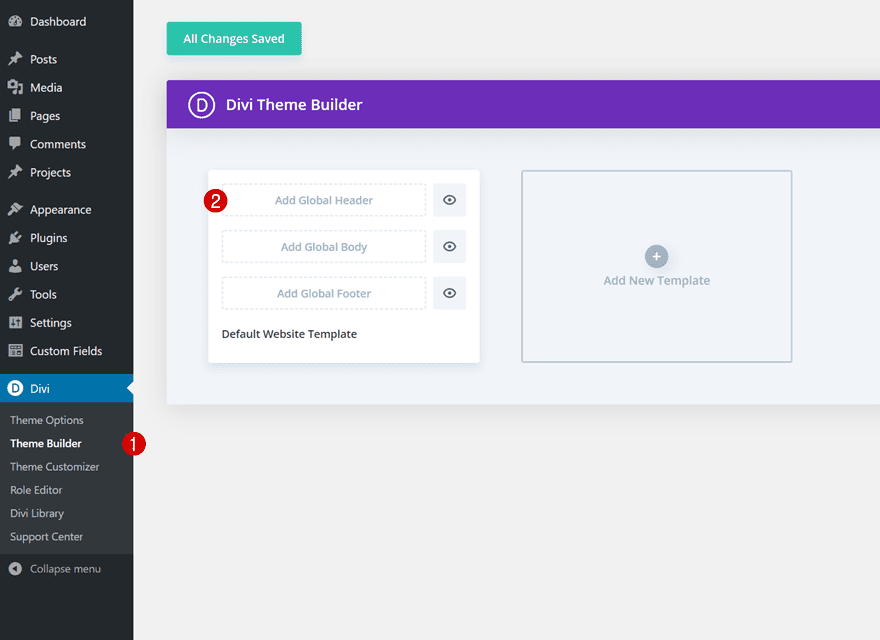
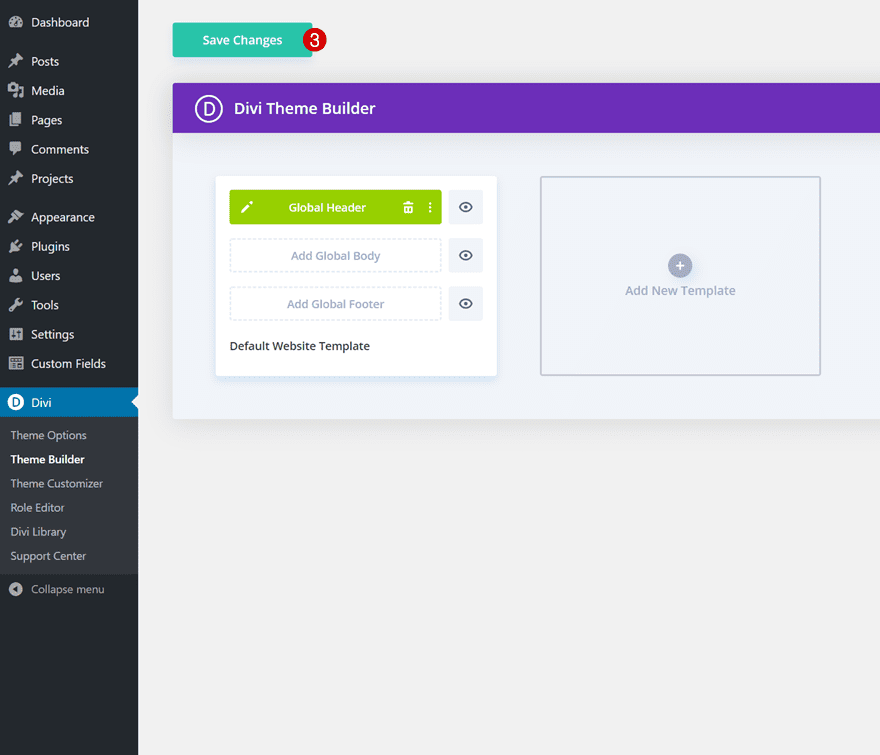
Go to Divi Theme Builder & Start Creating Global Header
Now that we’ve gone through the first part of this tutorial, getting our logo’s SVG code, it’s time to switch over to Divi! We’ll create a new global header by navigating to the Theme Builder inside the WordPress Backend.

Section Settings
Background Color
Once you’ve entered the global header template, you’ll notice a section. Open that section and apply a background color.
- Background Color: #eaeaea

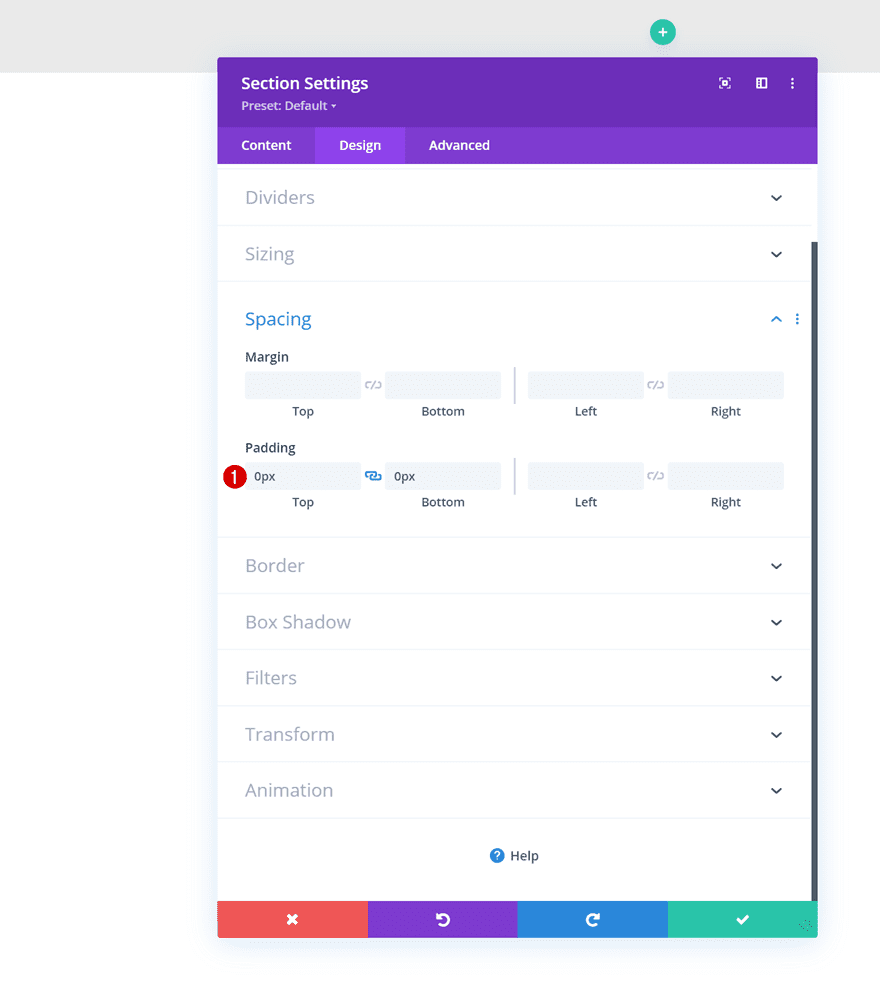
Spacing
Move on to the design tab and remove all default top and bottom padding next.
- Top Padding: 0px
- Bottom Padding: 0px
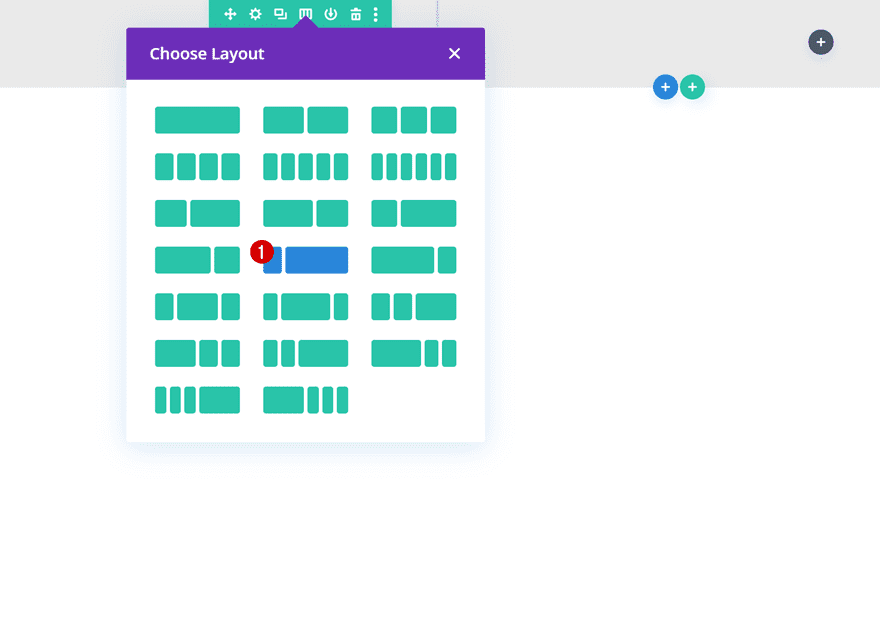
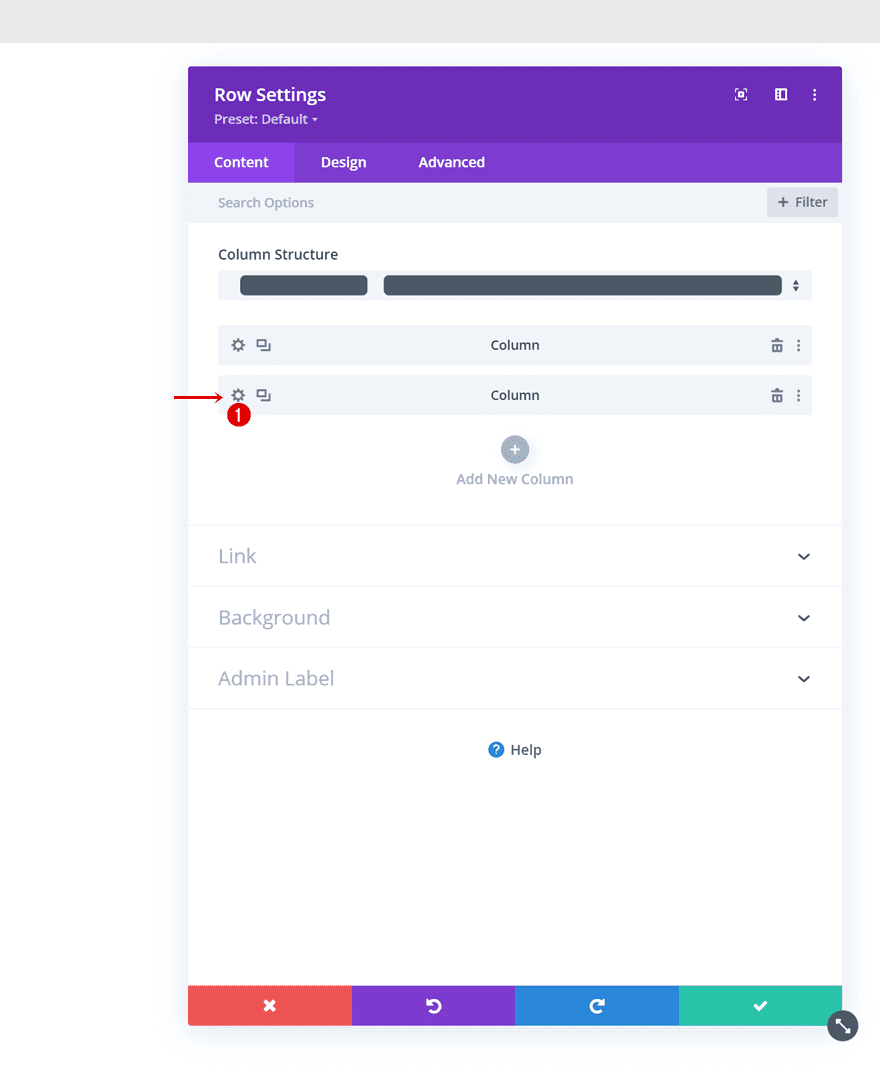
Add New Row
Column Structure
Continue by adding a new row using the following column structure:
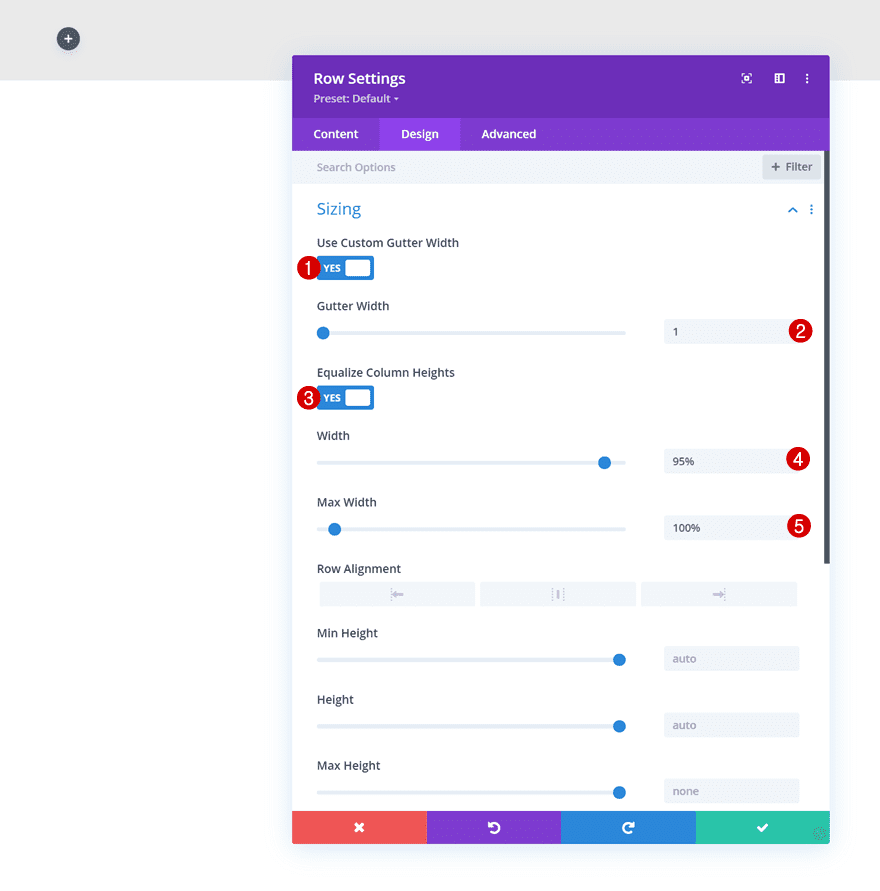
Sizing
Without adding any modules yet, open the row settings, go to the design tab and modify the sizing settings as follows:
- Use Custom Gutter Width: Yes
- Gutter Width: 1
- Equalize Column Heights: Yes
- Width: 95%
- Max Width: 100%
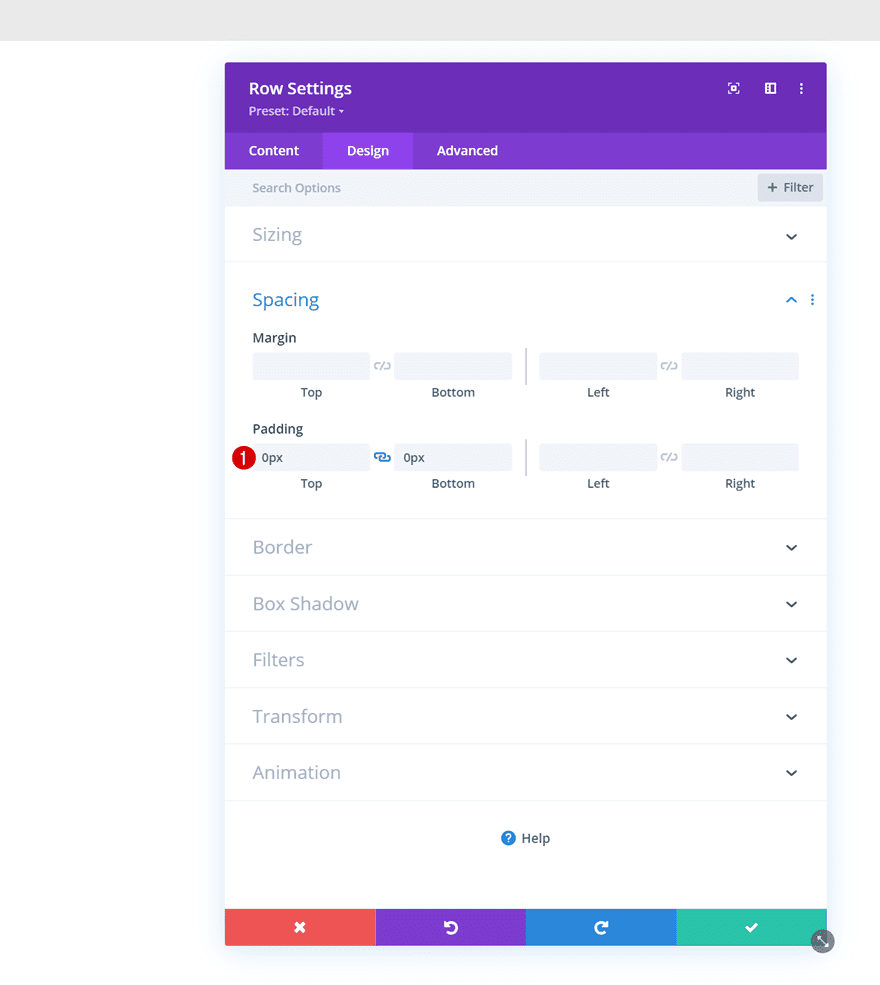
Spacing
Remove all default top and bottom padding too.
- Top Padding: 0px
- Bottom Padding: 0px
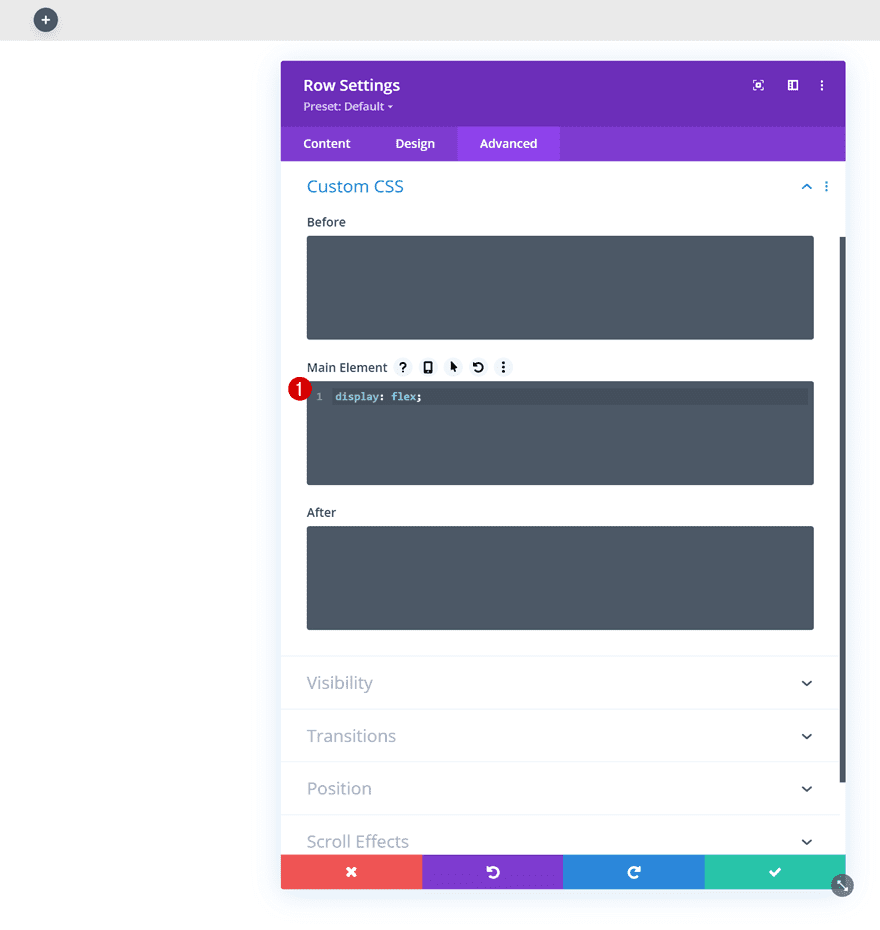
Main Element
To make sure our columns remain next to each other on smaller screen sizes, we’ll add one line of CSS code to the row’s main element too.
display: flex;
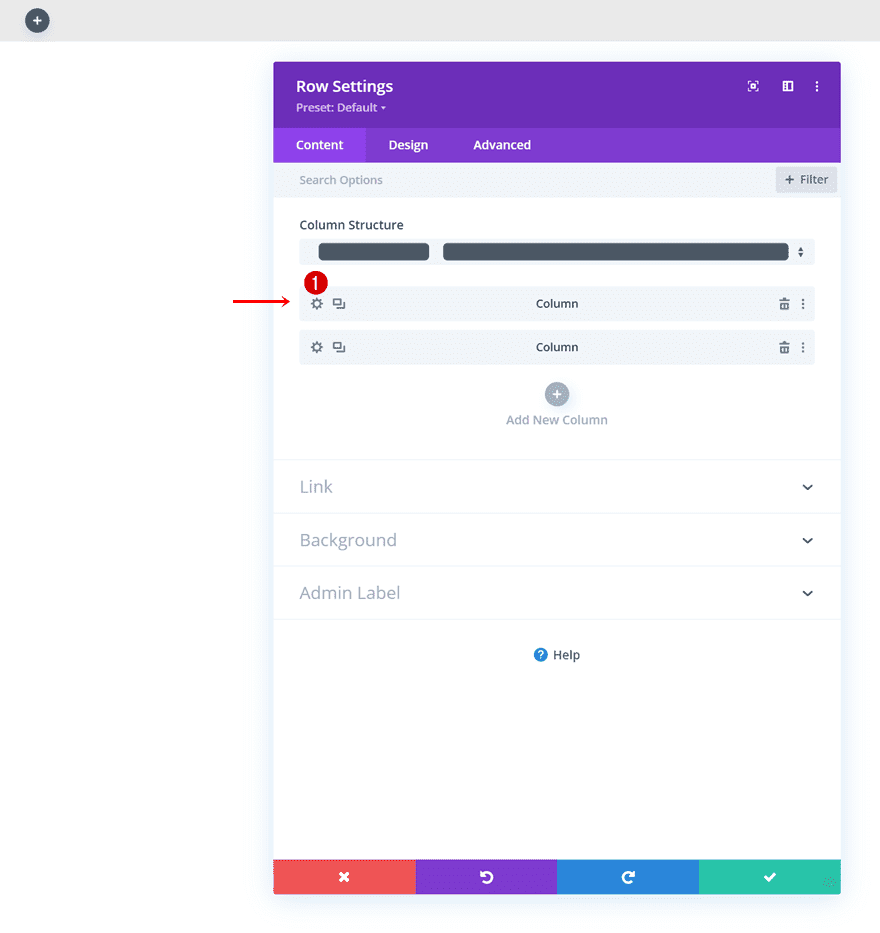
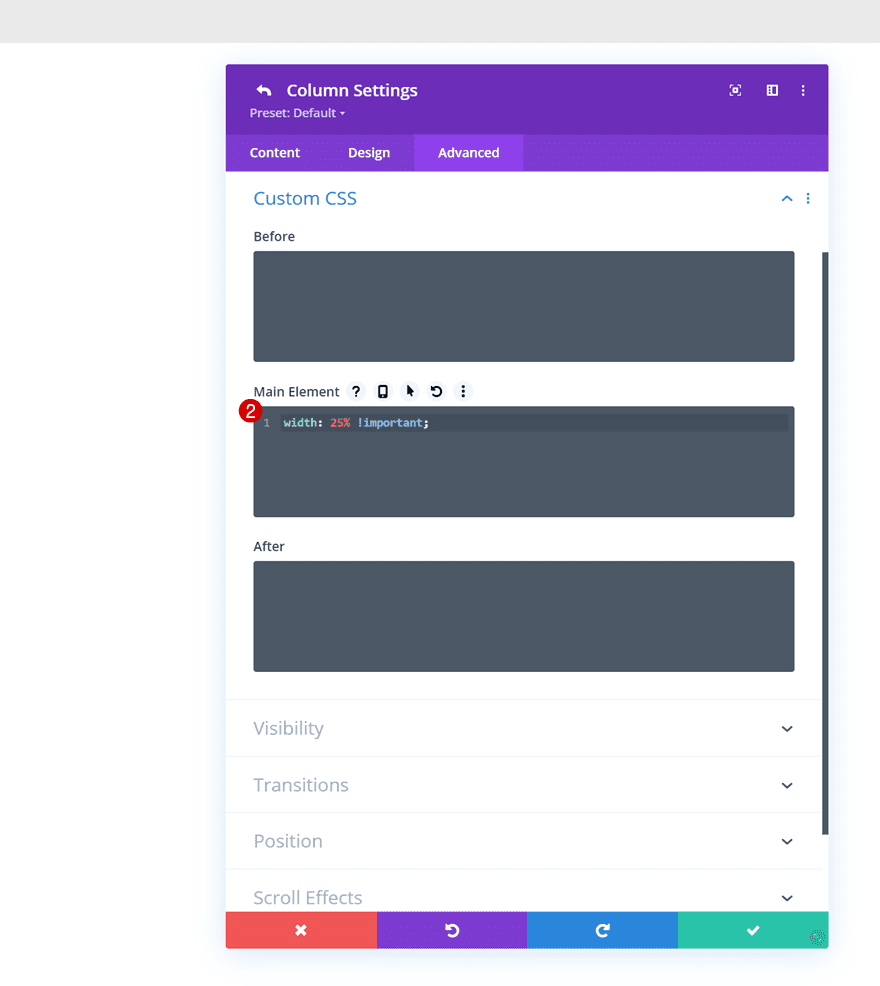
Column 1 Main Element
Next, we’ll make sure the column structure (1/4 and 3/4) is kept across smaller screen sizes by adding one line of CSS code to each column individually. Start with the first one.
width: 25% !important;
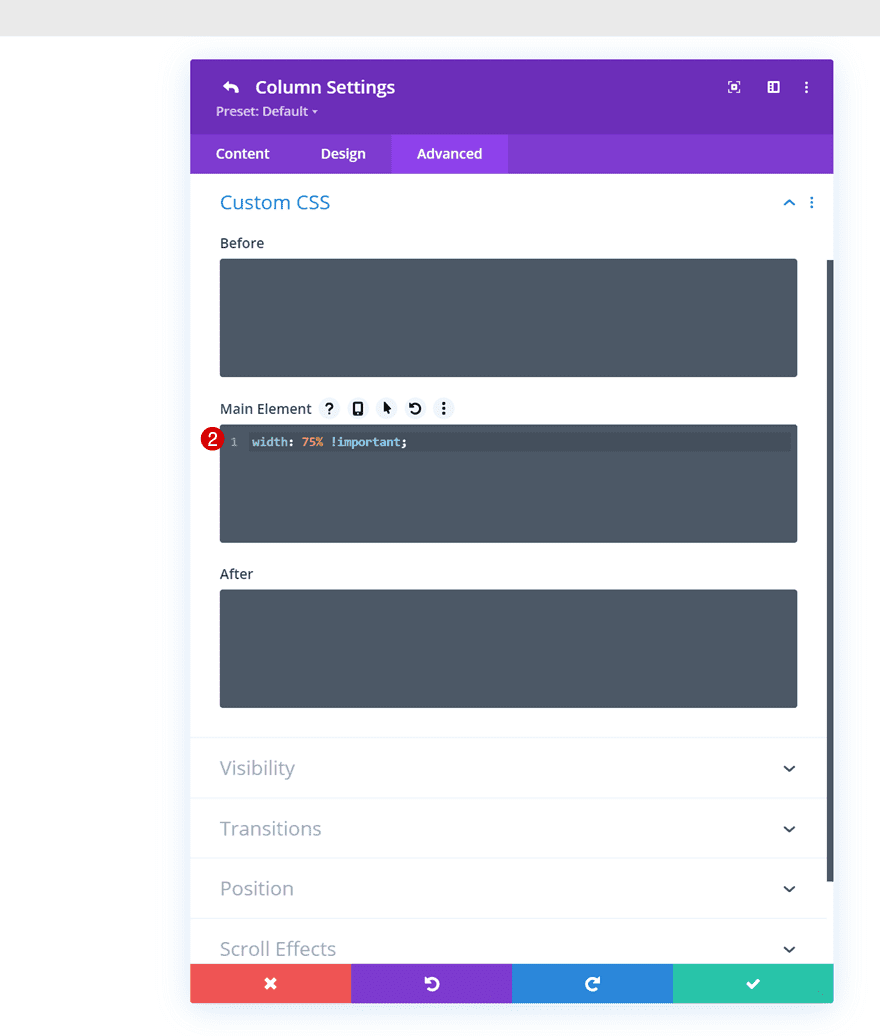
Column 2 Main Element
Do the same for the second column, but use another width percentage.
width: 75% !important;
3. Add SVG Logo (Inside Code Module)
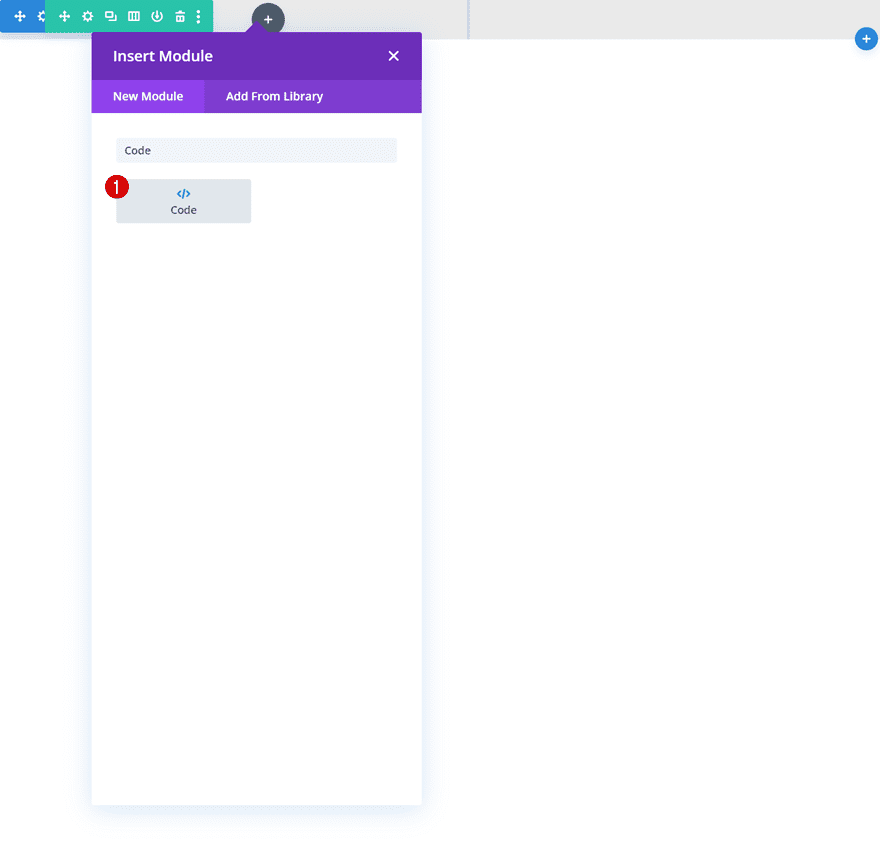
Add Code Module to Column 1
Time to add modules, starting with a first Code Module. We’ll place this Code Module in column 1 and use it to add our SVG code.
Add Copied SVG Code
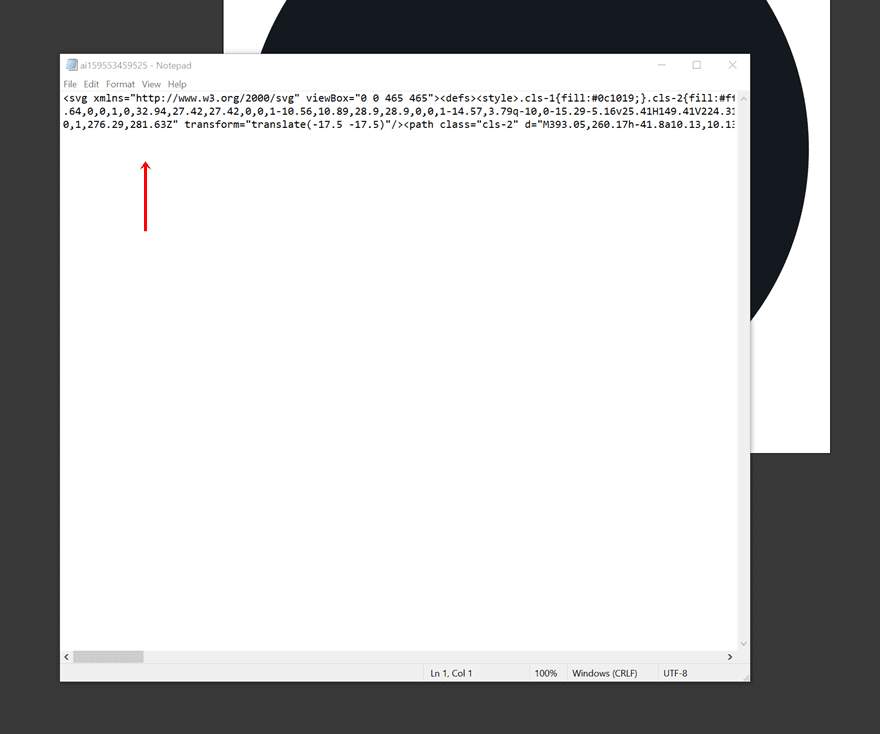
Structure it
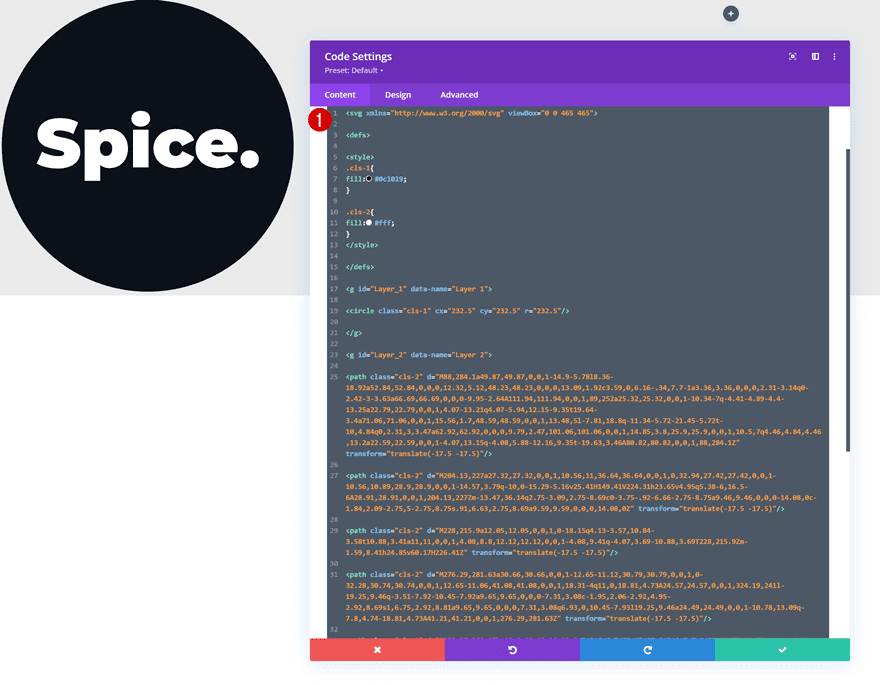
Once you’ve pasted the SVG code (see part 1 of this tutorial) inside the Code Module, it helps to structure everything as shown in the print screen below. That way, you’ll have a clean overview of the different elements inside the SVG.
<svg xmlns=”http://www.w3.org/2000/svg” viewBox=”0 0 465 465″> <defs> <style> .cls-1{ fill:#0c1019; } .cls-2{ fill:#fff; } </style> </defs> <g id=”Layer_1″ data-name=”Layer 1″> <circle class=”cls-1″ cx=”232.5″ cy=”232.5″ r=”232.5″/> </g> <g id=”Layer_2″ data-name=”Layer 2″> <path class=”cls-2″ d=”M88,284.1a49.87,49.87,0,0,1-14.9-5.78l8.36-18.92a52.84,52.84,0,0,0,12.32,5.12,48.23,48.23,0,0,0,13.09,1.92c3.59,0,6.16-.34,7.7-1a3.36,3.36,0,0,0,2.31-3.14q0-2.42-3-3.63a66.69,66.69,0,0,0-9.95-2.64A111.94,111.94,0,0,1,89,252a25.32,25.32,0,0,1-10.34-7q-4.41-4.89-4.4-13.25a22.79,22.79,0,0,1,4.07-13.21q4.07-5.94,12.15-9.35t19.64-3.4a71.06,71.06,0,0,1,15.56,1.7,48.59,48.59,0,0,1,13.48,5l-7.81,18.8q-11.34-5.72-21.45-5.72t-10,4.84q0,2.31,3,3.47a62.92,62.92,0,0,0,9.79,2.47,101.06,101.06,0,0,1,14.85,3.8,25.9,25.9,0,0,1,10.5,7q4.46,4.84,4.46,13.2a22.59,22.59,0,0,1-4.07,13.15q-4.08,5.88-12.16,9.35t-19.63,3.46A80.82,80.82,0,0,1,88,284.1Z” transform=”translate(-17.5 -17.5)”/> <path class=”cls-2″ d=”M204.13,227a27.32,27.32,0,0,1,10.56,11,36.64,36.64,0,0,1,0,32.94,27.42,27.42,0,0,1-10.56,10.89,28.9,28.9,0,0,1-14.57,3.79q-10,0-15.29-5.16v25.41H149.41V224.31h23.65v4.95q5.38-6,16.5-6A28.91,28.91,0,0,1,204.13,227Zm-13.47,36.14q2.75-3.09,2.75-8.69c0-3.75-.92-6.66-2.75-8.75a9.46,9.46,0,0,0-14.08,0c-1.84,2.09-2.75,5-2.75,8.75s.91,6.63,2.75,8.69a9.59,9.59,0,0,0,14.08,0Z” transform=”translate(-17.5 -17.5)”/> <path class=”cls-2″ d=”M228,215.9a12.05,12.05,0,0,1,0-18.15q4.13-3.57,10.84-3.58t10.88,3.41a11,11,0,0,1,4.08,8.8,12.12,12.12,0,0,1-4.08,9.41q-4.07,3.69-10.88,3.69T228,215.9Zm-1.59,8.41h24.85v60.17H226.41Z” transform=”translate(-17.5 -17.5)”/> <path class=”cls-2″ d=”M276.29,281.63a30.66,30.66,0,0,1-12.65-11.12,30.79,30.79,0,0,1,0-32.28,30.74,30.74,0,0,1,12.65-11.06,41.08,41.08,0,0,1,18.31-4q11,0,18.81,4.73A24.57,24.57,0,0,1,324.19,241l-19.25,9.46q-3.51-7.92-10.45-7.92a9.65,9.65,0,0,0-7.31,3.08c-1.95,2.06-2.92,4.95-2.92,8.69s1,6.75,2.92,8.81a9.65,9.65,0,0,0,7.31,3.08q6.93,0,10.45-7.93l19.25,9.46a24.49,24.49,0,0,1-10.78,13.09q-7.8,4.74-18.81,4.73A41.21,41.21,0,0,1,276.29,281.63Z” transform=”translate(-17.5 -17.5)”/> <path class=”cls-2″ d=”M393.05,260.17h-41.8a10.13,10.13,0,0,0,4.4,5.23,15,15,0,0,0,7.7,1.81,19.75,19.75,0,0,0,6.66-1,23.5,23.5,0,0,0,5.88-3.42l13,13.09q-8.79,9.69-26.29,9.68a43.19,43.19,0,0,1-19.14-4,30.43,30.43,0,0,1-12.76-11.17,31.09,31.09,0,0,1-.05-32.17,30.46,30.46,0,0,1,12.21-11.06,40.22,40.22,0,0,1,34.1-.33,28.65,28.65,0,0,1,12,10.67,30.85,30.85,0,0,1,4.45,16.83Q393.38,254.9,393.05,260.17Zm-38.94-17.93a10,10,0,0,0-3.3,5.95h19.36a10.06,10.06,0,0,0-3.3-5.89,9.51,9.51,0,0,0-6.38-2.15A9.72,9.72,0,0,0,354.11,242.24Z” transform=”translate(-17.5 -17.5)”/> <path class=”cls-2″ d=”M402,281.57a13.75,13.75,0,0,1-4.13-10.29A13.36,13.36,0,0,1,402,261.11a15.8,15.8,0,0,1,20.79,0,13.35,13.35,0,0,1,4.12,10.17,13.74,13.74,0,0,1-4.12,10.29,15.48,15.48,0,0,1-20.79,0Z” transform=”translate(-17.5 -17.5)”/> </g> </svg>
Add Stroke & Stroke Width to Elements in CSS Code
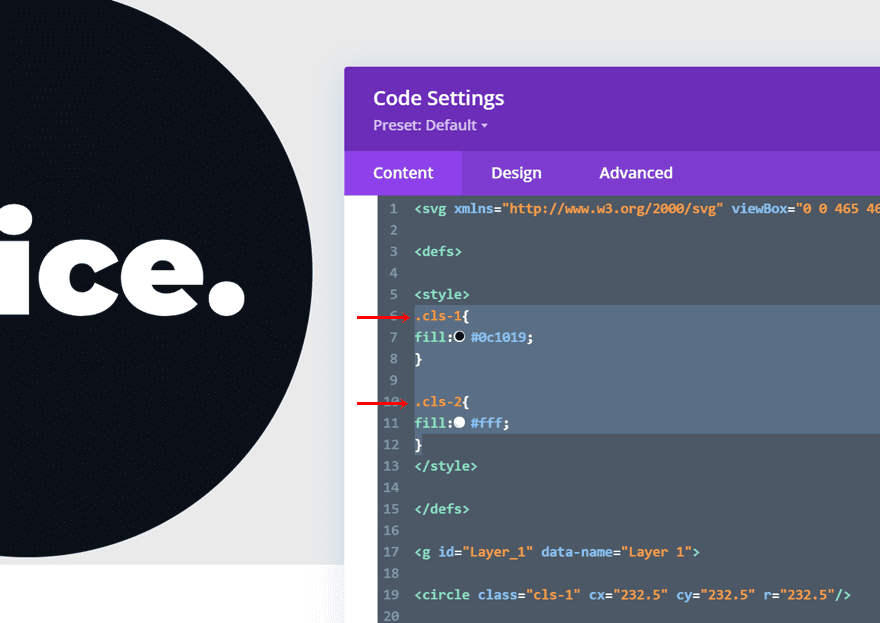
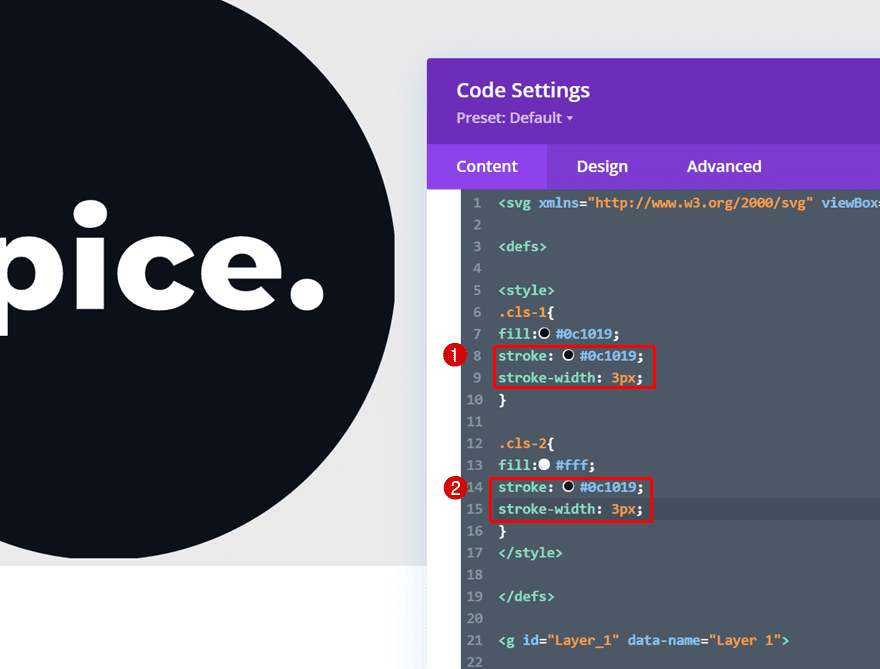
In Illustrator, we only used fill colors for the elements we added. The reason for that is because we want to avoid generating extra paths. SVG code isn’t always as predictable as you may think, so making some manual changes in the CSS code can often help keep the paths simple. To create the same outcome as in the preview of this post, we’ll need to add a stroke to both our elements. To do that, we’ll add to lines of CSS code to the two classes inside our code. The “cls-1” CSS class that was generated in AI stands for the circle, the “cls-2” CSS class represents the text outlines.
stroke: #0c1019; stroke-width: 3px;
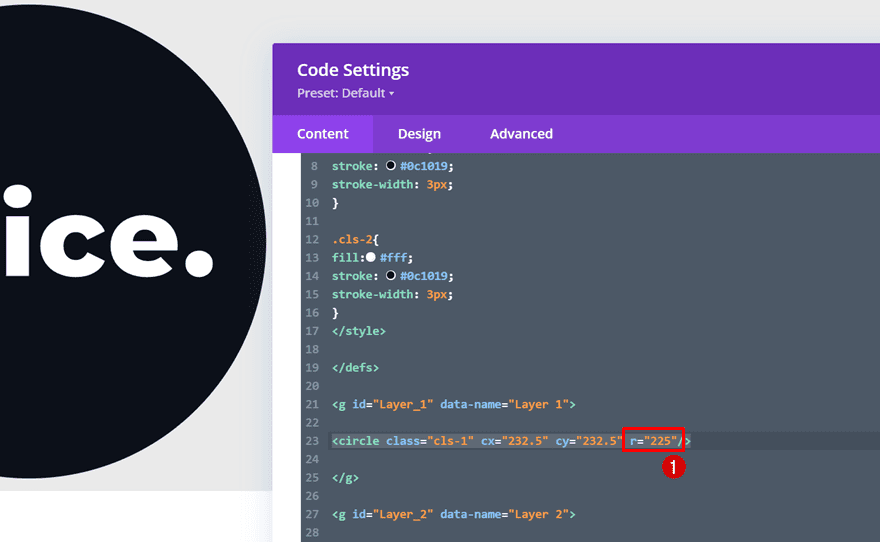
Decrease Circle Radius
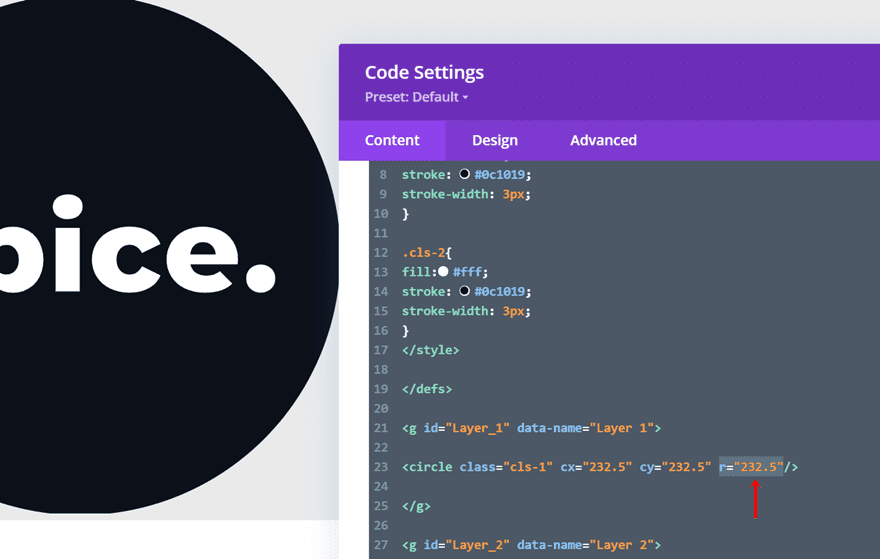
Because we’ve added an extra stroke to our circle, the circle seems to reach further than the SVG canvas (noticeable on the sides), to fix this, we’ll simply reduce the radius inside our circle tag. Instead of using the original “232.5”, we’re bringing it down to “225”. You can determine for yourself what value you prefer by gently playing around with this number.
- r=”225″
Modify Code Module Settings
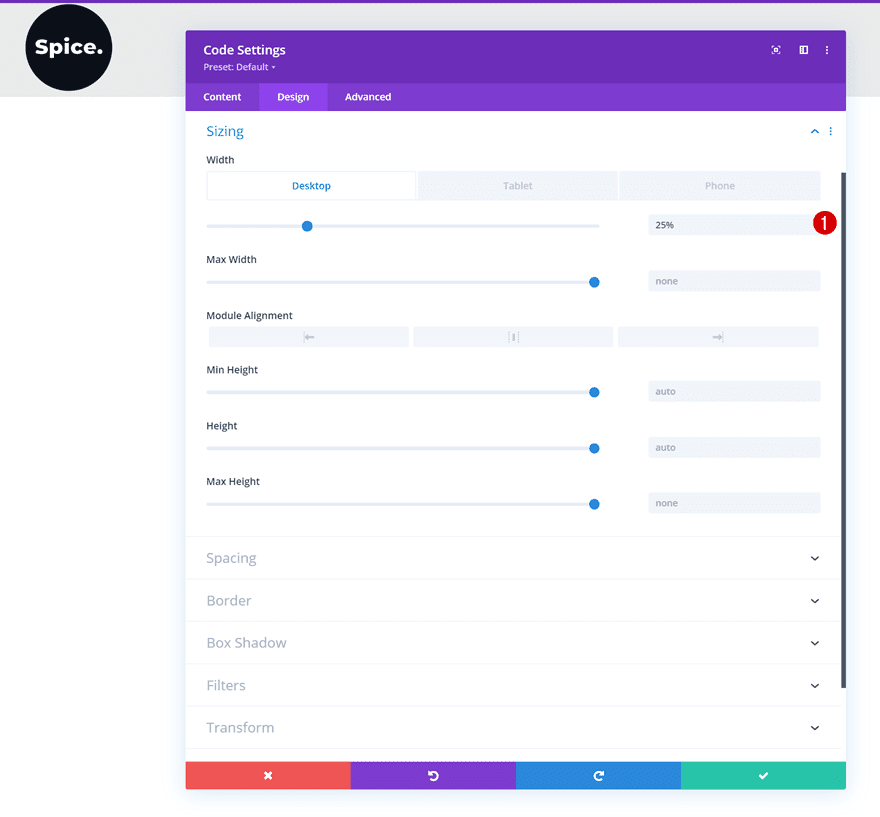
Sizing
Now that our SVG code is in place, we can make some additional changes to the Code Module itself. Go to the design tab and modify the module’s width across different screen sizes.
- Width:
- Desktop: 25%
- Tablet: 50%
- Phone: 80%
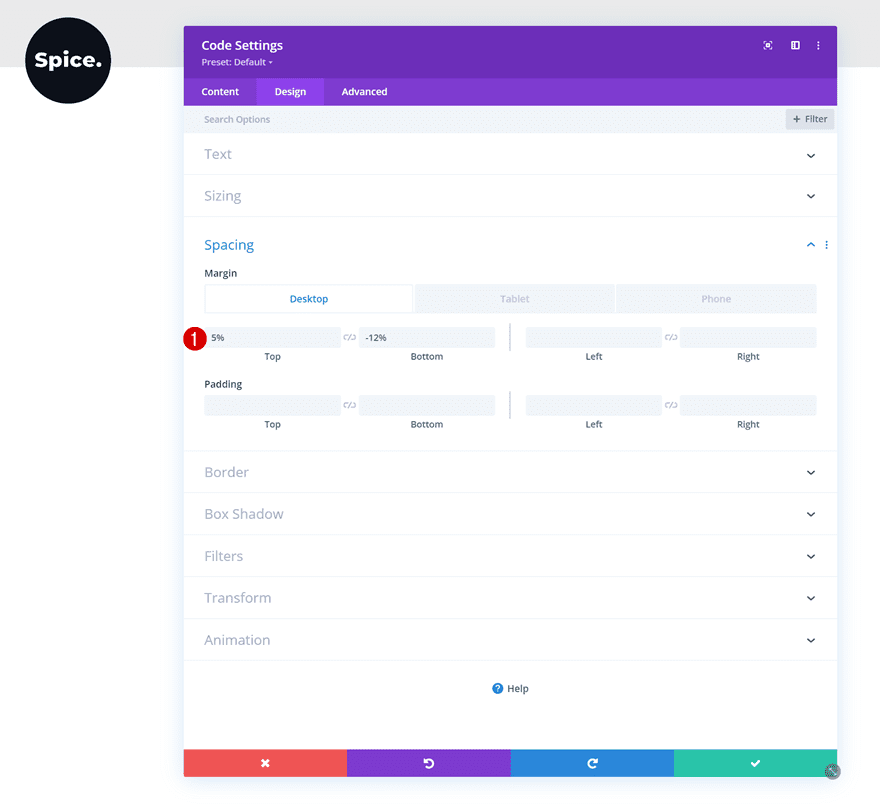
Spacing
We’re generating a bottom overlap as well by modifying the spacing settings.
- Top Padding: 5%
- Bottom Padding:
- Desktop: -12%
- Tablet: -20%
- Phone: -35%
4. Use Anime.js to Animate Your SVG Logo
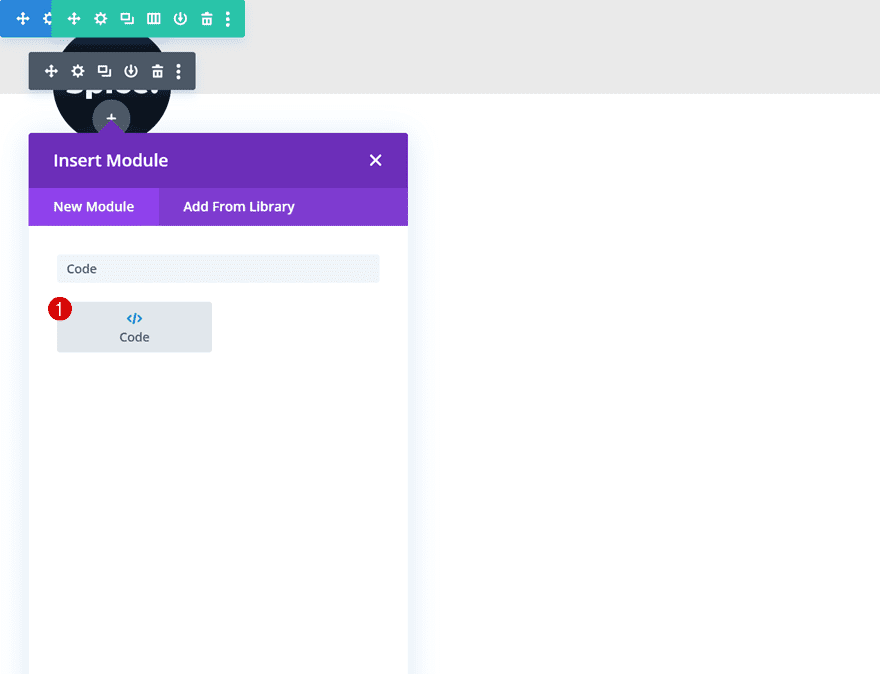
Add Another Code Module Below Previous One
Our SVG logo has been added to our Divi header! In the next part of this tutorial, we’ll animate the SVG logo using the Anime JS library. The drawing animation that you can see in the preview is one of their most popular ones but you can create any kind of animation with this library. Add a new Code Module right below the previous one.
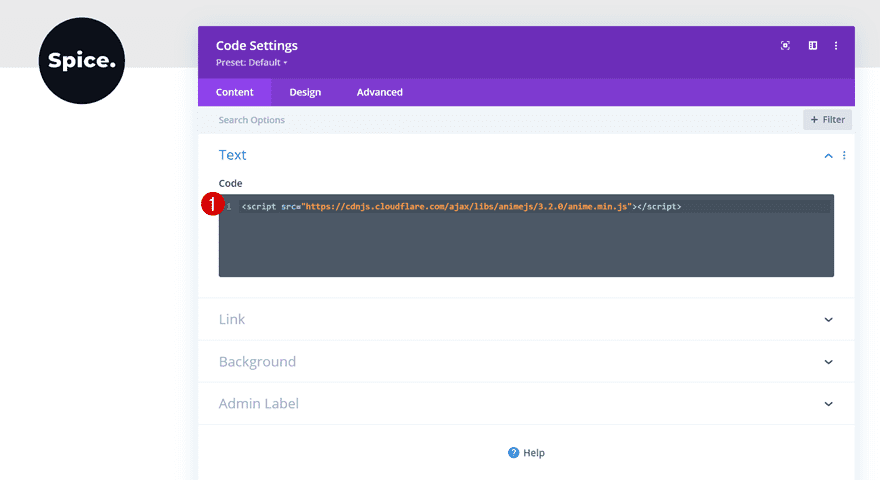
Add Anime Library
The first thing you’ll need to do is adding the library inside script tags.
- src=”https://cdnjs.cloudflare.com/ajax/libs/animejs/3.2.0/anime.min.js”
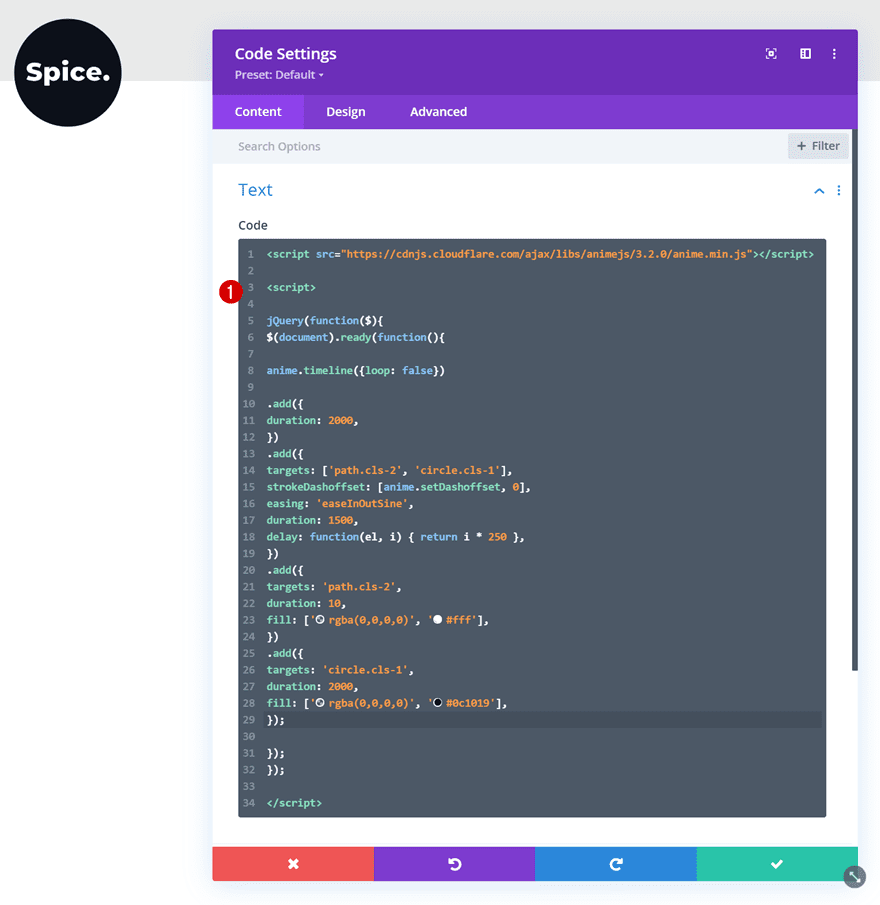
Add Anime Timeline Animation Code
Right below it, you’ll need to add the anime JS code between script tags as shown in the print screen below:
jQuery(function($){ $(document).ready(function(){ anime.timeline({loop: false}) .add({ duration: 2000, }) .add({ targets: [‘path.cls-2’, ‘circle.cls-1’], strokeDashoffset: [anime.setDashoffset, 0], easing: ‘easeInOutSine’, duration: 1500, delay: function(el, i) { return i * 250 }, }) .add({ targets: ‘path.cls-2’, duration: 10, fill: [‘rgba(0,0,0,0)’, ‘#fff’], }) .add({ targets: ‘circle.cls-1’, duration: 2000, fill: [‘rgba(0,0,0,0)’, ‘#0c1019’], }); }); });
Each “add” function represents an animation in a timeline of animations. You can modify these “add” functions however you want, add new ones or remove current ones, just make sure that the last add function is closed properly with a ‘;’ at the end (as you can see in the code above). You can add different CSS properties inside these “add” functions. You can find out more about the properties and how they’re used in the anime.js documentation examples.
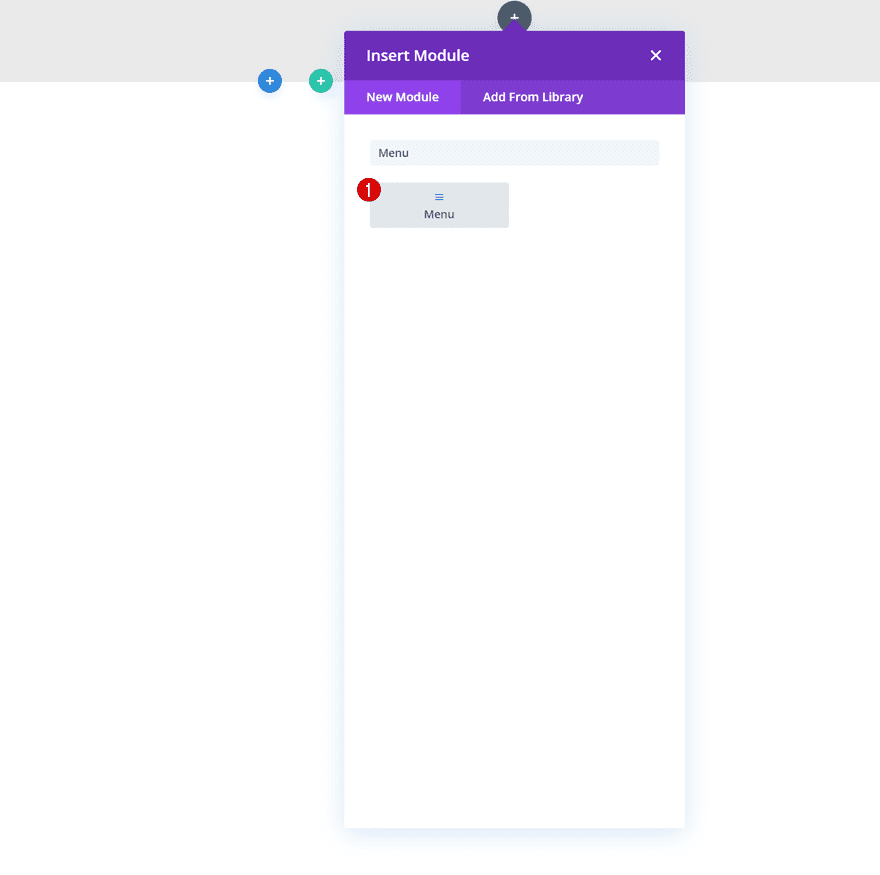
5. Add Menu Module to Column 2
The only element we need to complete our global header is a Menu Module in column 2.
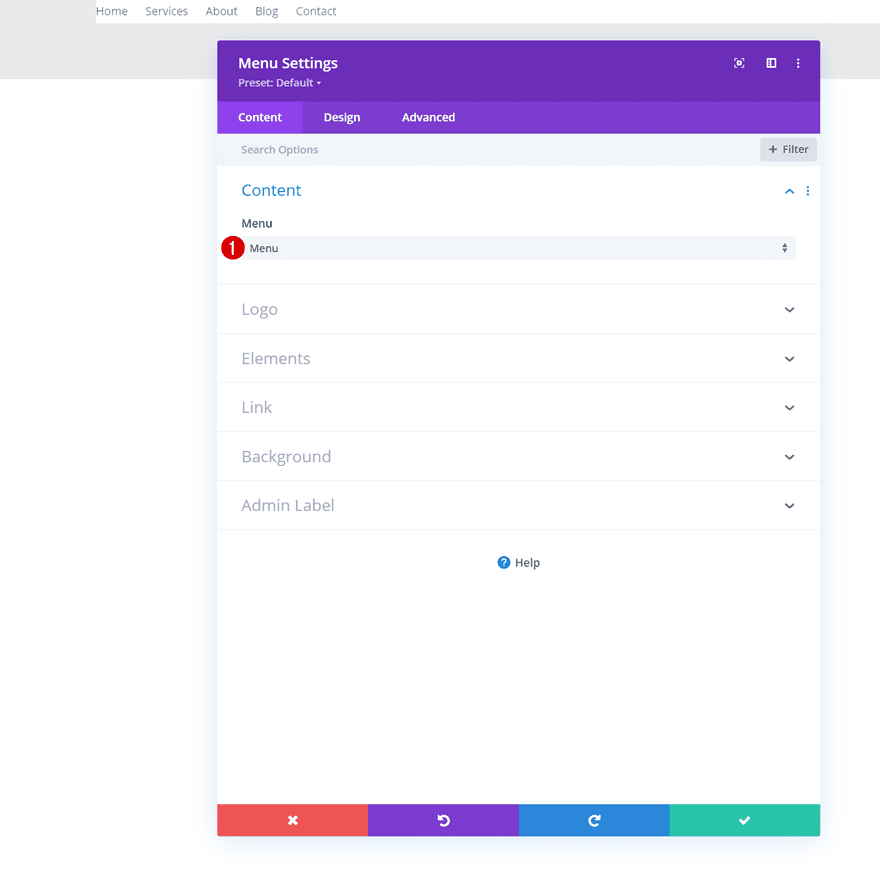
Select Menu
Select a menu of your choice.
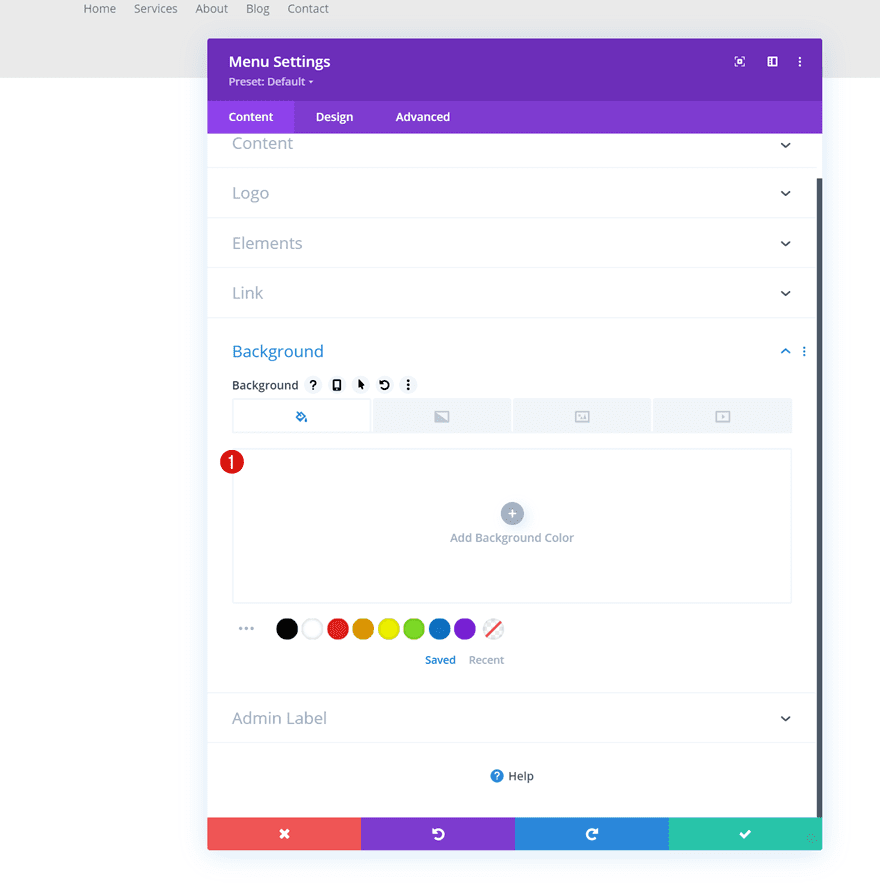
Remove Background Color
Then, remove the default background color.
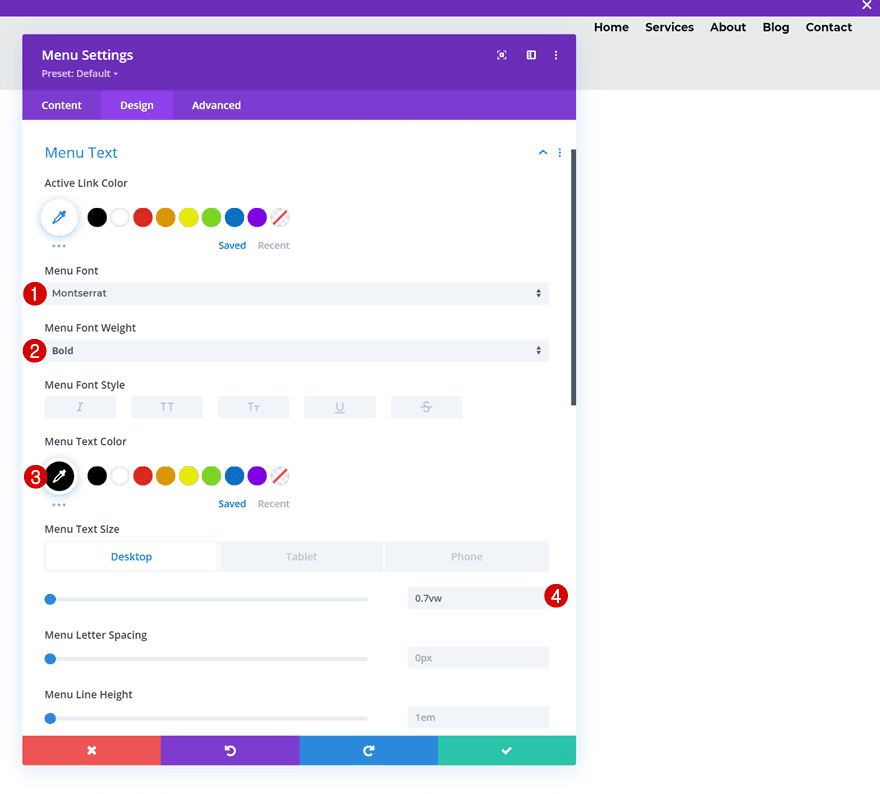
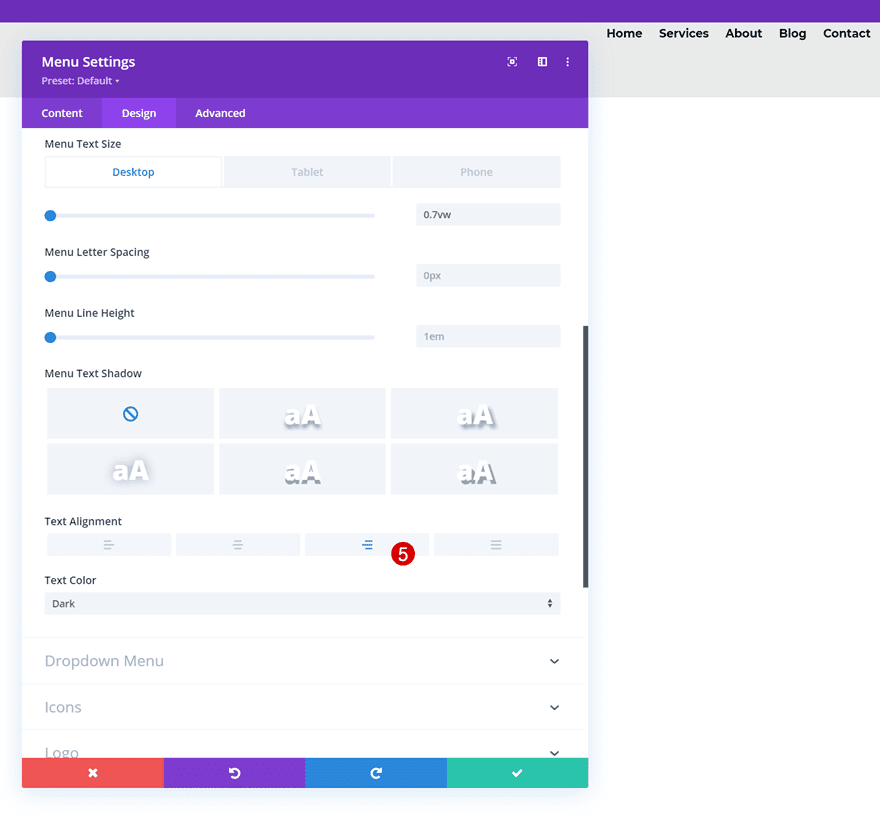
Menu Text Settings
Move on to the design tab and modify the menu text settings as follows:
- Menu Text Color: #000000
- Menu Text Size:
- Desktop: 0.7vw
- Tablet: 2.2vw
- Phone: 3vw
- Text Alignment: Right
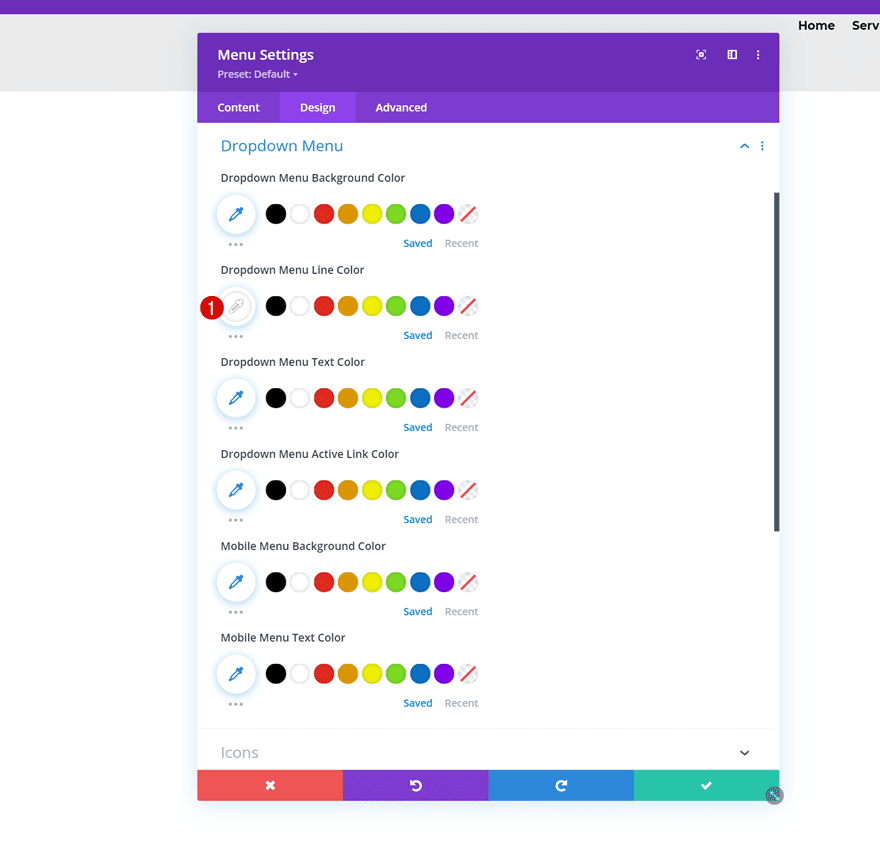
Dropdown Menu Text Settings
Change the dropdown menu line color too.
- Dropdown Menu Line Color: #ffffff
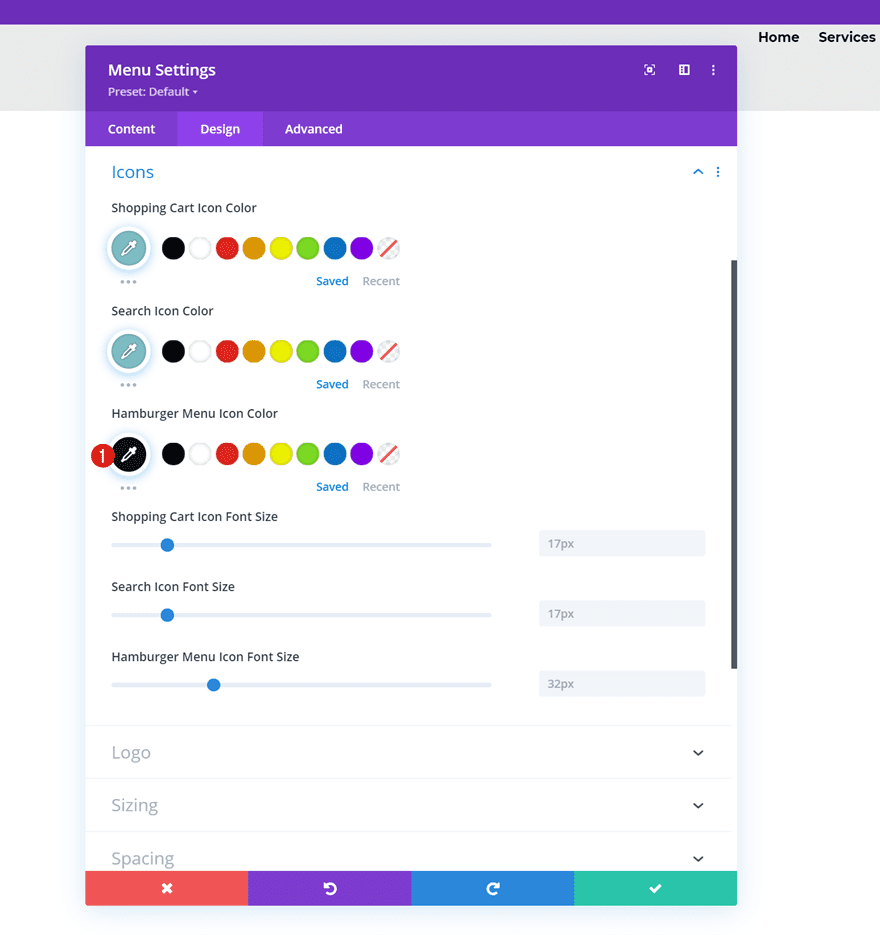
Icons Settings
Along with the hamburger menu icon color.
- Hamburger Menu Icon Color: #0c1019
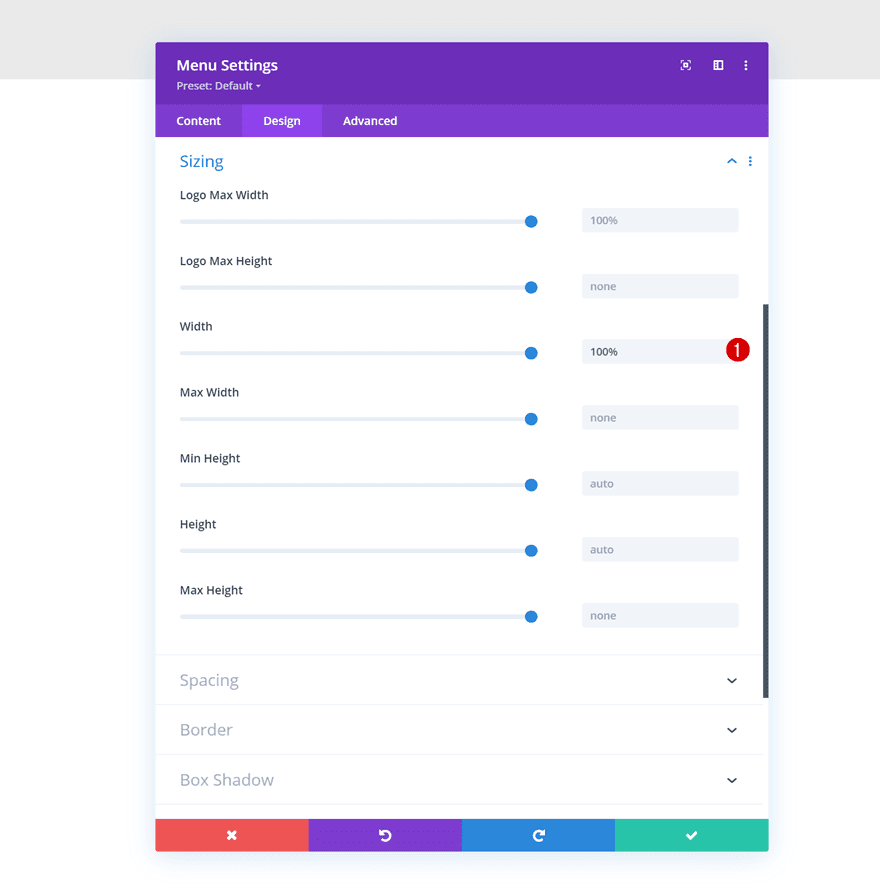
Sizing
Then, go to the sizing settings and make sure the width is “100%”.
- Width: 100%
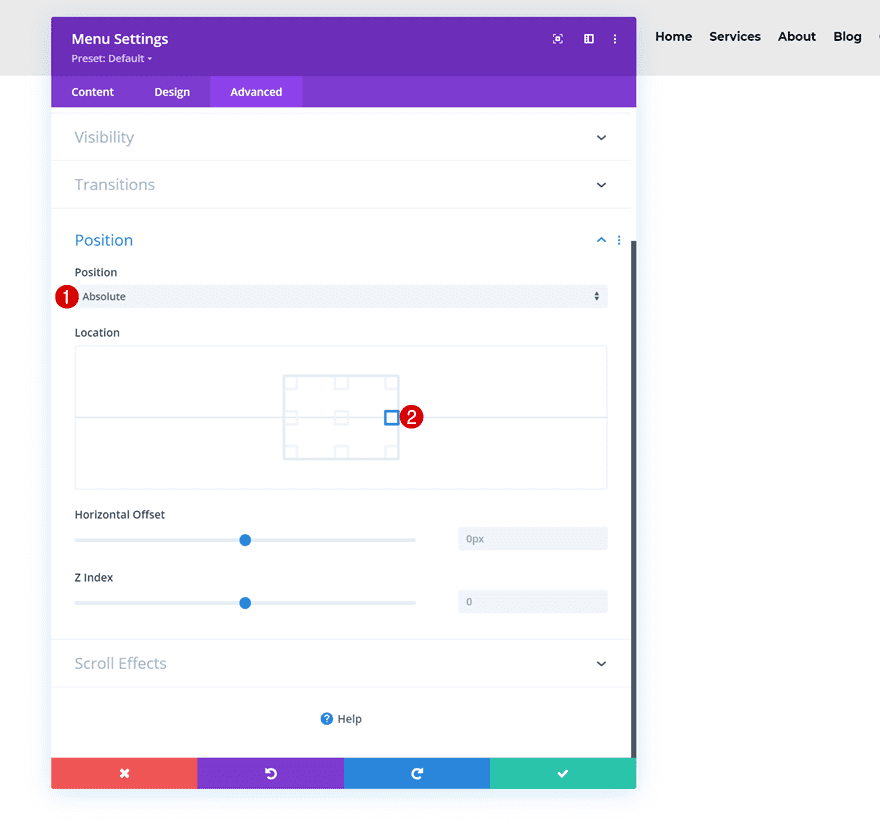
Position
Complete the module settings by repositioning the module in the advanced tab.
- Position: Absolute
- Location: Center Right
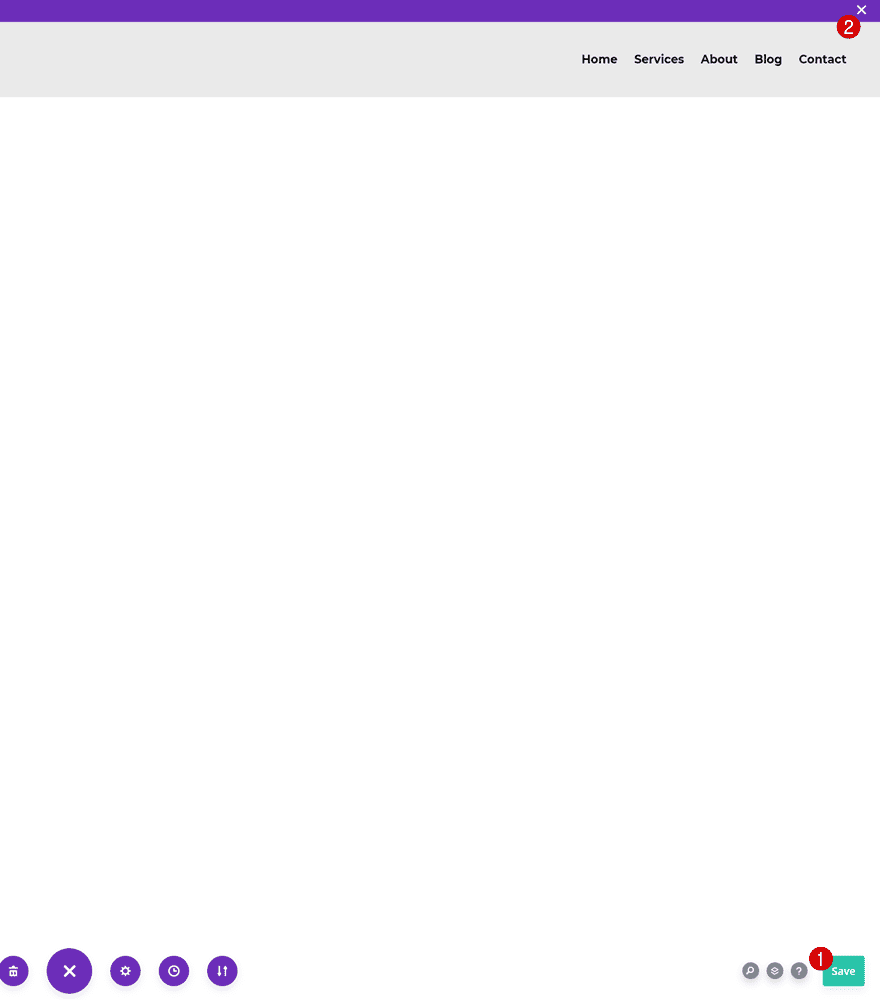
6. Save All Theme Builder Changes
Once you’ve completed the entire global header design, you can save all theme builder changes and view the outcome on your website!
Preview
Now that we’ve gone through all the steps, let’s take a final look at the outcome across different screen sizes.
Desktop
![]()
Mobile
![]()
Final Thoughts
In this post, we’ve shown you how to take your Divi global header one step further in your web development journey. More specifically, we’ve shown you how to add and animate your SVG logo using Divi and the Anime JavaScript library. You were able to download the global header template JSON file for free as well! If you have any questions or suggestions, feel free to leave a comment in the comment section below.
If you’re eager to learn more about Divi and get more Divi freebies, make sure you subscribe to our email newsletter and YouTube channel so you’ll always be one of the first people to know and get benefits from this free content.